Conda, Mamba, Micromamba — What's the Difference (and What You Should Actually Use)
Conda, Mamba, Micromamba — What’s the Difference
🧬 𝐷𝑎𝑦 70 𝑜𝑓 𝐷𝑎𝑖𝑙𝑦 𝐵𝑖𝑜𝑖𝑛𝑓𝑜𝑟𝑚𝑎𝑡𝑖𝑐𝑠 𝑓𝑟𝑜𝑚 𝐽𝑜𝑗𝑦’𝑠 You ran conda install on something.
Now your environment takes eight minutes to solve. Or it can’t solve at all. Or everything was working yesterday, and today you get a wall of red text about conflicting dependencies. Or — the most demoralizing outcome — your base environment is broken and you don’t know how it happened.
If any of that sounds familiar, this post is for you. We’re going to cut through the confusion around conda, mamba, and micromamba, explain exactly what each one does, and give you a workflow that will save you hours of frustration.
What is conda, and why does bioinformatics depend on it?
conda is two things at once: a package manager (it downloads and installs software) and an environment manager (it creates isolated software containers so your tools don’t conflict with each other).
Bioinformatics depends on it for one simple reason: the tools we use have complex, often incompatible dependencies. FastQC needs a specific version of Java. Bowtie2 needs a specific version of Python. GATK needs yet another. If you tried to install all of these into one global environment, they would constantly conflict — one tool’s required library version would break another tool entirely.
Conda solves this by creating environments: isolated boxes where each project gets exactly the software versions it needs, completely separated from everything else. You can have ten different projects on one computer, each with their own Python version and tools, and they will never interfere with each other.
The two commands everyone confuses: conda create vs conda install
This confusion is the source of more broken environments than anything else.
conda create — makes a new isolated environment
conda create -n myenv python=3.10
This creates a brand new, empty environment called myenv with Python 3.10 inside it. Nothing else. It does not install anything into your current environment. It does not touch base. It is a clean slate.
Think of it like creating a new project folder. You do this once per project, at the beginning.
conda install — installs a package into the currently active environment
conda activate myenv
conda install fastqc
This installs FastQC into myenv — the environment you activated. If you run conda install without activating an environment first, conda installs into base. This is almost always a mistake.
The rule that will save your setup:
Never install research software into
base. Base is conda’s home environment — it manages conda itself. If you break it by installing conflicting packages, you may have to reinstall conda from scratch.
Always create a new environment for each project, activate it, then install.
# The correct order, every time:
conda create -n metatranscriptomics python=3.10
conda activate metatranscriptomics
conda install fastqc bowtie2 samtools
The problem with conda: it is slow
Here is why conda frustrates people. Its dependency solver — the part that figures out which exact versions of packages are compatible with each other — is written in Python and is genuinely slow. For complex bioinformatics environments with 20+ packages, it can take 10–30 minutes to solve. Sometimes it fails entirely with a message like:
Solving environment: failed with initial frozen solve. Retrying with flexible solve.
Solving environment: failed with repodata from current_repodata.json...
This is not your fault. This is conda’s solver hitting its limits. The solution is mamba.
Mamba: conda but fast
Mamba is a drop-in replacement for conda that uses a C++ dependency solver instead of conda’s Python-based solver. It is dramatically faster — solving environments in seconds instead of minutes — and more reliable at finding solutions that conda fails to find.
The key thing to understand: mamba uses exactly the same commands as conda. You do not need to learn anything new. Just replace the word conda with mamba:
# Instead of this (slow):
conda install -c bioconda fastqc bowtie2 samtools

# Do this (fast):
mamba install -c bioconda fastqc bowtie2 samtools
Same channels, same package names, same flags. Just faster.
Installing mamba
# Install mamba into your base environment once
conda install -n base -c conda-forge mamba
Note: As of conda 23.x, you can also enable the fast solver directly without installing mamba as a separate tool:
conda config --set solver libmamba. Either approach gives you the speed benefit.
Micromamba: built for HPC and containers
Micromamba is a standalone, self-contained binary that reimplements the mamba functionality without requiring a base conda installation at all. It has no base environment and no conda dependency — you download one file and it works.
This makes it ideal for two situations:
HPC clusters: Many clusters have an older system-wide conda or none at all. Installing micromamba in your home directory gives you full environment management without needing admin access or touching anything system-wide.
Containers: In Docker or Singularity containers, you want the smallest possible footprint. Micromamba adds almost nothing to container size compared to a full Miniconda installation.
# Install micromamba (Linux / HPC)
"${SHELL}" <(curl -L micro.mamba.pm/install.sh)

# Usage is identical to mamba/conda
micromamba create -n myenv python=3.10
micromamba activate myenv
micromamba install -c bioconda fastqc bowtie2
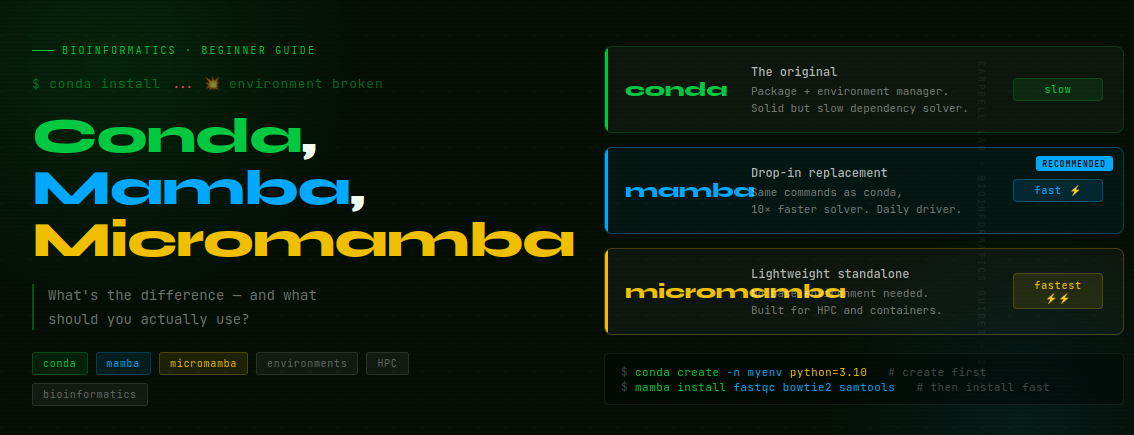
Conda vs Mamba vs Micromamba — the comparison
| conda | mamba | micromamba | |
|---|---|---|---|
| What it is | Original package + environment manager | Faster drop-in replacement | Standalone binary, no base needed |
| Solver speed | Slow | Fast | Fast |
| Installation | Comes with Anaconda / Miniconda | Install into base conda | Single binary download |
| Commands | conda install etc. | Same — just type mamba | Same — just type micromamba |
| Base environment | Yes | Yes (uses conda’s base) | No — fully standalone |
| Best for | Learning the concepts | Daily bioinformatics work | HPC clusters · containers |
The recommendation:
- Just starting out? Use conda. The slowness teaches patience, and understanding conda makes mamba trivial.
- Daily bioinformatics work? Switch to mamba. Install it once, use it everywhere.
- Working on HPC or in containers? Use micromamba. No installation politics, no base environment to protect.
A real workflow from scratch
Here is the complete pattern to memorize for starting any new bioinformatics project:
# Step 1: Create a dedicated environment
# Give it a meaningful name — not "test" or "env1"
conda create -n metatranscriptomics python=3.10

# Step 2: Activate it
conda activate metatranscriptomics

# Step 3: Install tools using mamba (fast)
mamba install -c bioconda -c conda-forge \
  fastqc \
  fastp \
  sortmerna \
  bowtie2 \
  samtools \
  subread

# Step 4: Export your environment for reproducibility
conda env export > environment.yml

# Step 5: Deactivate when done
conda deactivate
That environment.yml file is critical. Commit it to your git repository immediately. Anyone — including future you — can recreate your exact environment with:
conda env create -f environment.yml
What an environment.yml looks like
name: metatranscriptomics
channels:
  - bioconda
  - conda-forge
  - defaults
dependencies:
  - python=3.10
  - fastqc=0.12.1
  - fastp=0.23.4
  - sortmerna=4.3.6
  - bowtie2=2.5.4
  - samtools=1.19
  - subread=2.0.6
This single file makes your computational environment fully reproducible — months later, on a different computer, on a collaborator’s machine, on a new HPC allocation.
Channels: the part nobody explains clearly
Packages come from channels — online repositories. The three you need to know:
conda-forge is the largest community channel. It has the most packages and the most up-to-date versions. Use it as your first choice for general packages.
bioconda is the bioinformatics-specific channel. FastQC, Bowtie2, SAMtools, GATK, DESeq2 — all here. Always pair it with conda-forge.
defaults is Anaconda’s official channel. Used automatically if you specify nothing. Sometimes has older versions than conda-forge.
The right way to install bioinformatics tools:
mamba install -c bioconda -c conda-forge samtools
Or set them globally once so you never need to type -c again:
conda config --add channels conda-forge
conda config --add channels bioconda
conda config --set channel_priority strict
The channel_priority strict setting is important — it tells conda to respect the channel order you specified and not mix package versions across channels randomly. Mixing channels is one of the main causes of broken environments.
Common mistakes that break environments
Installing everything into base
# BAD — pollutes base, hard to recover
conda install samtools bowtie2

# GOOD — create a dedicated environment first
conda create -n myproject
conda activate myproject
mamba install samtools bowtie2
Mixing channels inconsistently
# BAD — installs packages from different channels without order
conda install -c bioconda samtools
conda install -c defaults python

# GOOD — specify channels consistently every time
mamba install -c bioconda -c conda-forge samtools python
Never exporting the environment
You finish a project, everything works. Six months later, on a new machine, you cannot remember what you installed. Always export:
conda env export > environment.yml
git add environment.yml
git commit -m "add environment file"
One giant environment for everything
# BAD — 50 tools from three projects, one broken dependency breaks all of them
conda activate everything_env

# GOOD — one focused environment per project
conda activate metatranscriptomics
Smaller environments solve faster, break less, and are easier to debug. A focused environment with 10 tools is far more maintainable than a kitchen-sink environment with 50.
Running conda update --all without thinking
# RISKY — updates every package in your environment at once
conda update --all

# SAFER — update only what you specifically need
mamba install samtools=1.20
On HPC: conda vs module load
Many HPC systems offer tools through the module system (module load bowtie2). When should you use modules versus conda?
Use module load when you need a tool that your HPC admin has specifically compiled and optimized for that cluster’s hardware — this can be meaningfully faster for compute-intensive tools.
Use conda / micromamba when you need a specific version not available in the module system, you need reproducibility across different clusters, you need Python packages, or you are building a pipeline that others need to run elsewhere.
On Palmetto and similar clusters, a practical hybrid works well: module load for heavy compute steps (Bowtie2 alignment, STAR), and a micromamba environment for Python-based analysis (Snakemake, custom scripts, downstream R via conda-installed R packages).
Quick reference card
# Create
conda create -n myenv python=3.10

# Activate
conda activate myenv

# Install fast
mamba install -c bioconda -c conda-forge fastqc bowtie2 samtools

# List all environments
conda env list

# List packages in active environment
conda list

# Export
conda env export > environment.yml

# Recreate from file
conda env create -f environment.yml

# Remove an environment
conda env remove -n myenv

# Deactivate
conda deactivate
The one-line summary
Use mamba for daily work. Use micromamba on HPC. Never install into
base. One environment per project. Always exportenvironment.yml.
That is everything you need. The edge cases will come — a package that only exists on one channel, a conflict that requires pinning a specific version, a tool that needs a separate environment entirely — but you will debug those one at a time, and the conda-forge and bioconda GitHub issues are surprisingly helpful when you do.
Have a broken environment story or a tool installation question? Drop it in the comments.